TABLE OF CONTENTS
I. Login Address
II. View Own Login Address
III. Admins: View Users' Login Addresses
IV. Update Login Address
V. Additional Notification Addresses
VI. Contact Address
VII. 2FA Address
I. Login Address
The login address can be used to access the account. This same address receives all email notifications.
This is the only email address which receives meeting invite email notifications, and meeting update email notifications.
This address can only be edited by each user themself. Admins cannot edit this on their users' behalf.
II. View Own Login Address
Members and observers can view only their own login addresses.
This is possible on the web app via the following steps:
-
Click the gray silhouette or profile picture at the top right side of the page
-
Click User Settings

-
Click Login and Password

The email address listed in the Login email address text box is the login address.
This field cannot be viewed on the mobile app.
III. Admins: View Users' Login Addresses
Admins can view the login address(es) of others via the following steps:
-
Click People on the leftmost menu
-
The names of all admins, members, and observers are listed

-
-
Click a person's name, opening their profile page
-
The login address is listed beside the text Login address

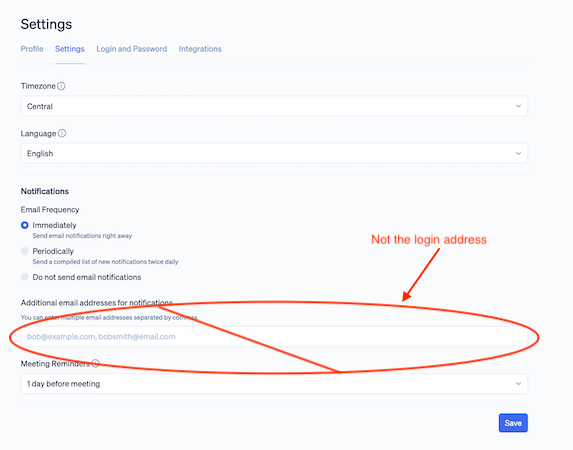
The login address is not visible or editable in the User settings > Settings menu, where additional notification addresses can be set.
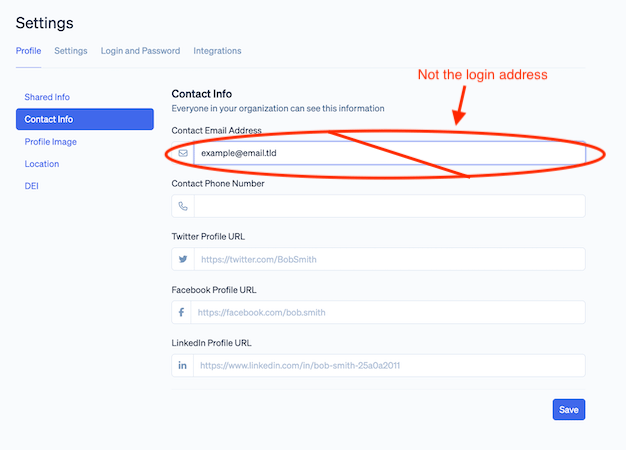
The login address is not visible or editable in the User Settings > Profile > Contact Info menu, where contact addresses can be set.
The login address is not visible from the page that opens after clicking People on the leftmost menu; this field displays the contact address only.

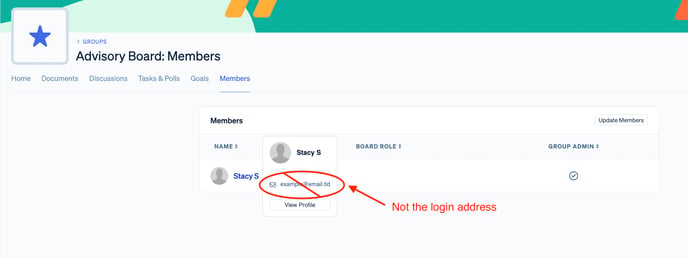
The login address is not visible from the menu that pops out after clicking a name in a group's members list; this field displays the contact address only.
The addresses listed in these fields cannot be used for login or receipt of meeting invites unless they match the login address.
IV. Update Login Address
Each user can update their own login address. Admins cannot update this on the behalf of others.
To update your own login address on the web app:
-
Log in to Boardable
-
Click the profile picture or gray silhouette from the top right side of the screen
-
Click User Settings

-
Settings menu opens
-
-
Click Login and Password
-
Delete old email address from the Login email address text box
-
Type new email address
-
Click Save

This cannot be done on the mobile app.
V. Additional Notification Address
Additional Notification Addresses can receive notifications for the following items:
-
Signature requests
-
Comments (on meetings, polls, tasks, goals, and discussions)
-
Group membership
-
New discussions
-
Poll assignments
-
Task assignments
-
Goal assignments
This address cannot receive meeting invite notifications, or meeting update notifications.
Matching this address to the login address causes notification duplicates. For the best possible experience, please only use an address other than the login address as the additional notification location.
To learn how to view and edit this field in user settings, please see Related Articles.
VI. Contact Address
The contact address, if added, is displayed to all users in the organization. This is designed to facilitate communication between board members.
This address cannot be used for login unless it matches the login address. It cannot receive meeting invite notifications, or meeting update notifications unless it matches the login address.
To learn how to view and edit this field in user settings, please see Related Articles.
The contact address is displayed in the following locations:
-
In the People directory
-
In the user profile
-
In the menu that pops out when hovering over a user's name from a group member list
VII. 2FA Address
A 2FA email address can be used to receive codes for two-factor authentication completion.
This address cannot be used for login unless it matches the login address. It cannot receive meeting invite notifications, or meeting update notifications unless it matches the login address.
Editing the login address does not automatically edit the 2FA address.
To edit a 2FA address:
-
Click the gray silhouette or profile picture in the top right corner of the screen
-
Click User Settings
-
Click Disable beneath Two-factor authentication heading
-
Click Enable Two Factor Authentication
-
Click Use Email Instead
-
Enable two factor authentication email menu opens

-
-
Delete old email address from text box this opens
-
Type new email address
-
Click Send verification code
-
Verification code is sent to address listed during step 8
-
Verification code menu opens
-
-
Copy code received to email mailbox
-
Paste this in the verification code menu
-
Click Confirm
-
All set message displays
-
To return to Boardable interface, click Go to Boardable
-
Related Articles
-
User Settings: Learn about personal profile settings, options available (i.e. contact info, login, notifications, timezone) and how to connect a Zoom account
-
Mobile — View & Edit User Settings: Learn how to open user settings on the mobile app and make changes.
-
Edit Boardable User: Learn how to edit user information as an Administrator and what information the Administrator edits versus the user.
-
User Two Factor Authentication (2FA): Learn how to set up two factor authentication through User Settings.
-
Calendar Event Notifications: Automatically send meeting invitations and changes as calendar events.
-
Notifications: New Comments, Discussions, Polls, Tasks, and Meetings. Administrators, Group Owners, Group Administrators, and Collaborators.